
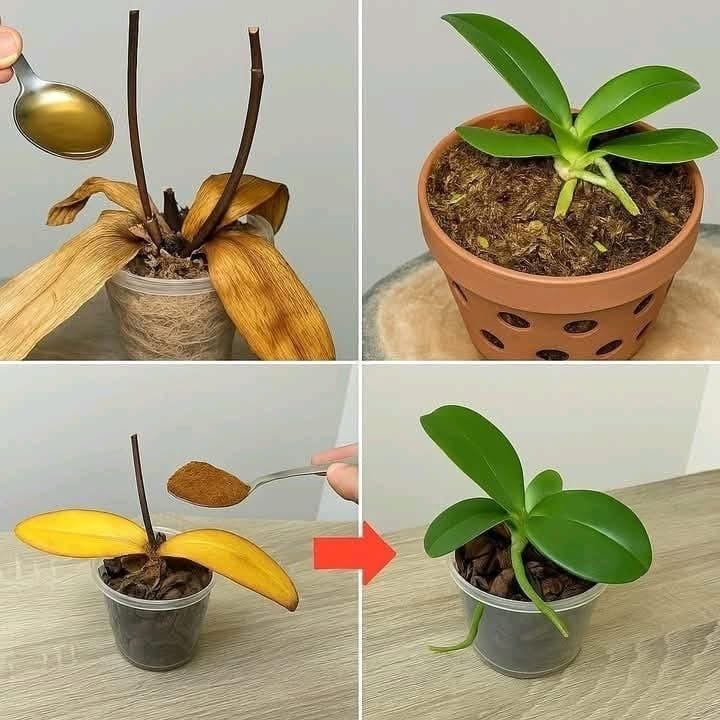
Orchids are among the most beautiful and elegant houseplants, admired for their exotic blooms and long-lasting flowers. While they have a reputation for being difficult to care for, many orchids can thrive for years with the right attention. However, one of the most common problems orchid owners face is root rot.
If your orchid has limp leaves, black roots, or seems to be dying, don’t throw it away just yet. Even orchids that appear to be in poor condition can often recover with proper care. By removing damaged roots and creating the ideal growing environment, you can encourage healthy new growth and enjoy your plant once again.
What Causes Orchid Root Rot?
Root rot develops when orchid roots remain wet for extended periods. Unlike many houseplants, orchids need excellent air circulation around their roots. Excess moisture deprives the roots of oxygen, allowing fungi and bacteria to thrive.
Common causes include:
- Overwatering
- Poor drainage
- Old or compacted potting mix
- Pots without drainage holes
- Poor air circulation
- Water collecting in the crown of the plant
Once the roots begin to rot, they lose their ability to absorb water and nutrients, causing the entire plant to decline.
Signs Your Orchid Needs Help
Watch for these warning signs:
- Yellow or drooping leaves
- Wrinkled or limp foliage
- Mushy, brown, or black roots
- A foul smell coming from the pot
- Flowers falling off early
- Slow or no new growth
Healthy orchid roots are firm and either green when wet or silvery-gray when dry.
Step 1: Remove the Orchid from Its Pot
Carefully remove the orchid from its container.
Shake away the old potting material and gently rinse the roots with lukewarm water. This makes it easier to identify which roots are healthy and which need to be removed.
Work carefully to avoid damaging any healthy roots that remain.
Step 2: Trim Away Rotten Roots
Using clean, sterilized scissors or pruning shears, remove every root that is soft, mushy, hollow, or black.
Leave only the firm, healthy roots attached to the plant.
If the flower spike has turned completely brown and dry, it can also be trimmed away so the orchid focuses its energy on producing new roots and leaves.
Step 3: Repot Using Fresh Orchid Mix
Never place the orchid back into old potting material.
Use a fresh orchid mix made from coarse bark, coconut husk, charcoal, or other materials designed to provide excellent airflow around the roots.
Choose a pot with several drainage holes to allow excess water to escape easily.
Avoid using regular potting soil, which retains far too much moisture for orchids.
Step 4: Water Properly
After repotting, water the orchid lightly and allow any excess water to drain completely.
Going forward, only water when the growing medium is almost dry.
Many orchid owners prefer soaking the pot for several minutes before allowing it to drain thoroughly.
Never allow the plant to sit in standing water.
Step 5: Give It Bright, Indirect Light
Light is essential for recovery.
Place the orchid where it receives bright, indirect sunlight throughout the day.
Avoid direct afternoon sun, which may burn the leaves.
A bright windowsill with filtered light is often the ideal location.
Step 6: Increase Humidity
Orchids naturally grow in humid environments.
You can improve humidity by:
- Using a humidity tray filled with pebbles and water
- Running a humidifier nearby
- Grouping several houseplants together
Good humidity encourages healthy root development without leaving the roots constantly wet.
Step 7: Be Patient
Orchids recover slowly.
It may take several weeks before you notice new roots or leaves beginning to grow.
Signs your orchid is recovering include:
- Bright green root tips
- New leaves emerging from the center
- Firmer foliage
- Improved leaf color
Patience is one of the most important parts of successful orchid care.
Should You Fertilize?
Wait until your orchid begins producing new growth before applying fertilizer.
Use a fertilizer specifically designed for orchids and apply it at half strength during active growth.
Too much fertilizer can damage weak or recovering roots.
Common Mistakes to Avoid
Many orchid problems result from simple care mistakes.
Avoid these common errors:
- Watering too frequently
- Using regular garden soil
- Leaving water trapped in the crown
- Keeping the orchid in dark conditions
- Overfertilizing
- Ignoring poor air circulation
Correcting these issues greatly increases your orchid’s chances of recovery.
Can an Orchid Without Roots Be Saved?
Even orchids that have lost nearly all of their roots can sometimes survive.
If the crown of the plant remains healthy, new roots may eventually develop under the right conditions.
Recovery may take several months, but many orchid enthusiasts have successfully revived plants that initially appeared beyond saving.
Long-Term Orchid Care Tips
Once your orchid has recovered, maintain healthy growing conditions by:
- Watering only when needed
- Repotting every one to two years
- Using fresh orchid bark
- Providing bright indirect light
- Maintaining moderate humidity
- Ensuring good air circulation
- Inspecting roots regularly
Consistent care is the best way to prevent future problems.
Final Thoughts
A rotting orchid isn’t necessarily a lost cause. With careful attention, proper pruning, fresh potting mix, and a balanced watering routine, many struggling orchids can make a remarkable recovery. Although the process requires patience, the reward of seeing fresh roots, healthy leaves, and beautiful blooms return is well worth the effort. By understanding your orchid’s needs and avoiding common mistakes, you can enjoy a thriving plant for many years to come.
